Platform Engineering Enablement.
End-to-end self service for developers, scalable for platform teams, and secure by design.


Embed enhanced security and cost efficiency with our built-in infrastructure isolation. It keeps your environments and teams separate, effectively reducing security risks and isolating costs.
Enhance your security by minimising the risk of unauthorised access. Our system ensures access is granted strictly for the required duration, embodying the principle of least privilege for optimal protection
Empower your teams with dedicated environments, providing them with the ability to manage applications, resources, and infrastructure securely and independently, ensuring streamlined operations and robust security


.png)
.png)
Give the right level of freedom to your Developers with integrated policy. Keep costs low and your security posture high.
.png)
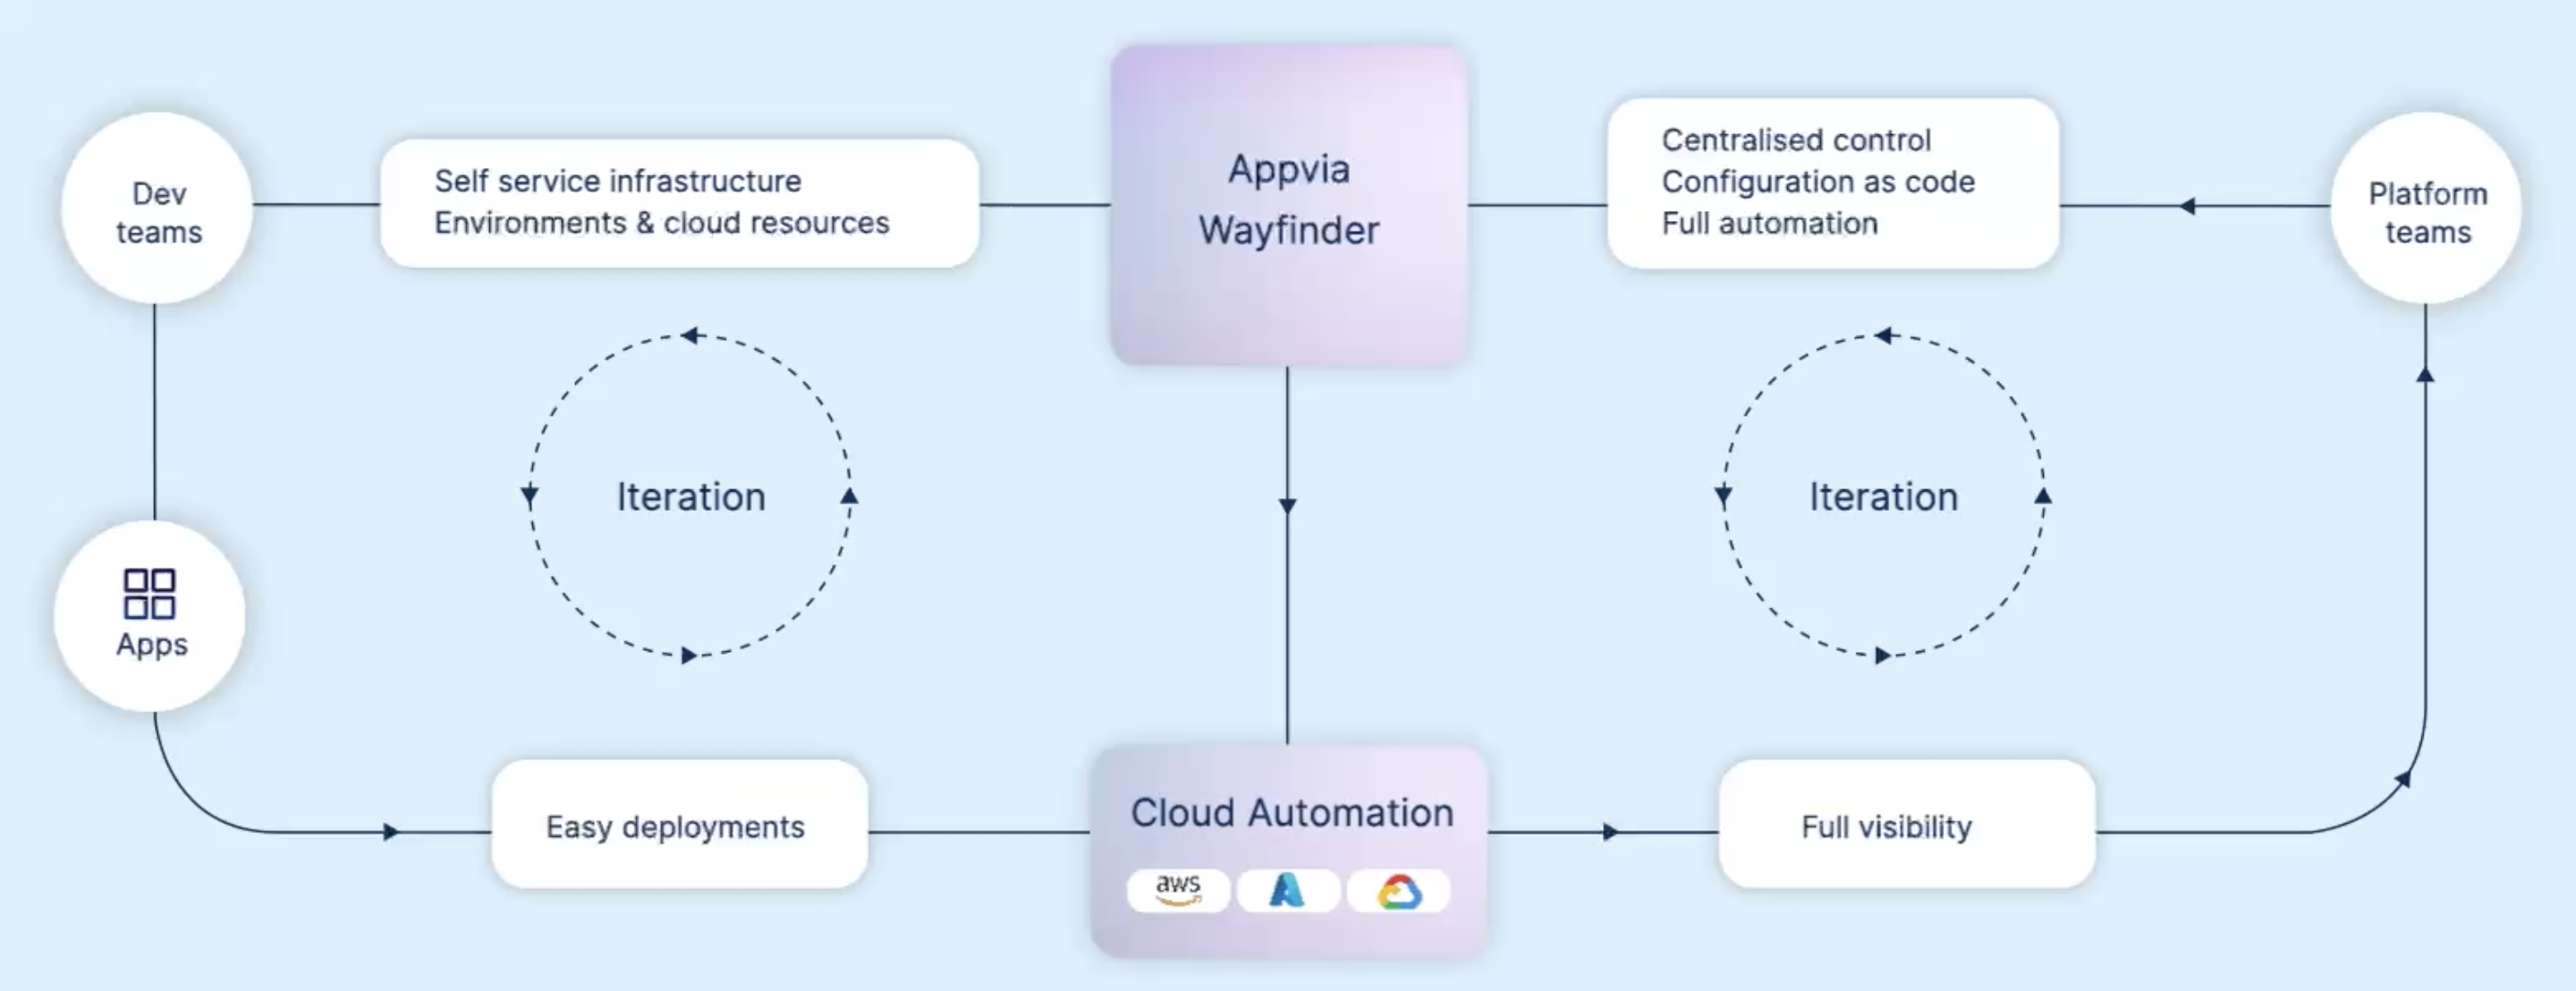
Integrate Wayfinder into existing tools easily. Use self-service choices and system information to create dynamic configuration of services.
.png)
Use ephemeral environments to keep costs low and move quickly through to production.
.png)
Have self-service Kubernetes clusters with all the policies and custom integrations in place.
.png)
Director, Enterprise Technology
Appvia have shown a drive to not just innovate within the service they provide but provide guidance and assistance to other parts of the organization to promote both product and agile delivery.

Head of Platform Engineering
Appvia have helped us realise our cloud-first strategy with the excellent product solutions they have implemented at the Bank of England. The security, governance and peace of mind brought in by the cloud landing zone, and paired with the DevOps culture that they’ve brought in the Bank, we’ve dramatically accelerated our journey to cloud-native adoption.


Lead Machine Learning Engineer
Wayfinder is straightforward to use, with an intuitive GUI that allows us to easily have a holistic view of the state of the clusters.


.png)

.png)

.png)